Septic Tank Tools
There are two methods for adding tanks to the map:
- Single Tank Tool

- Treatment Train Tool (dialog window for creating, managing multiple treatment trains)

Single Tank Tool
To start using the tool:
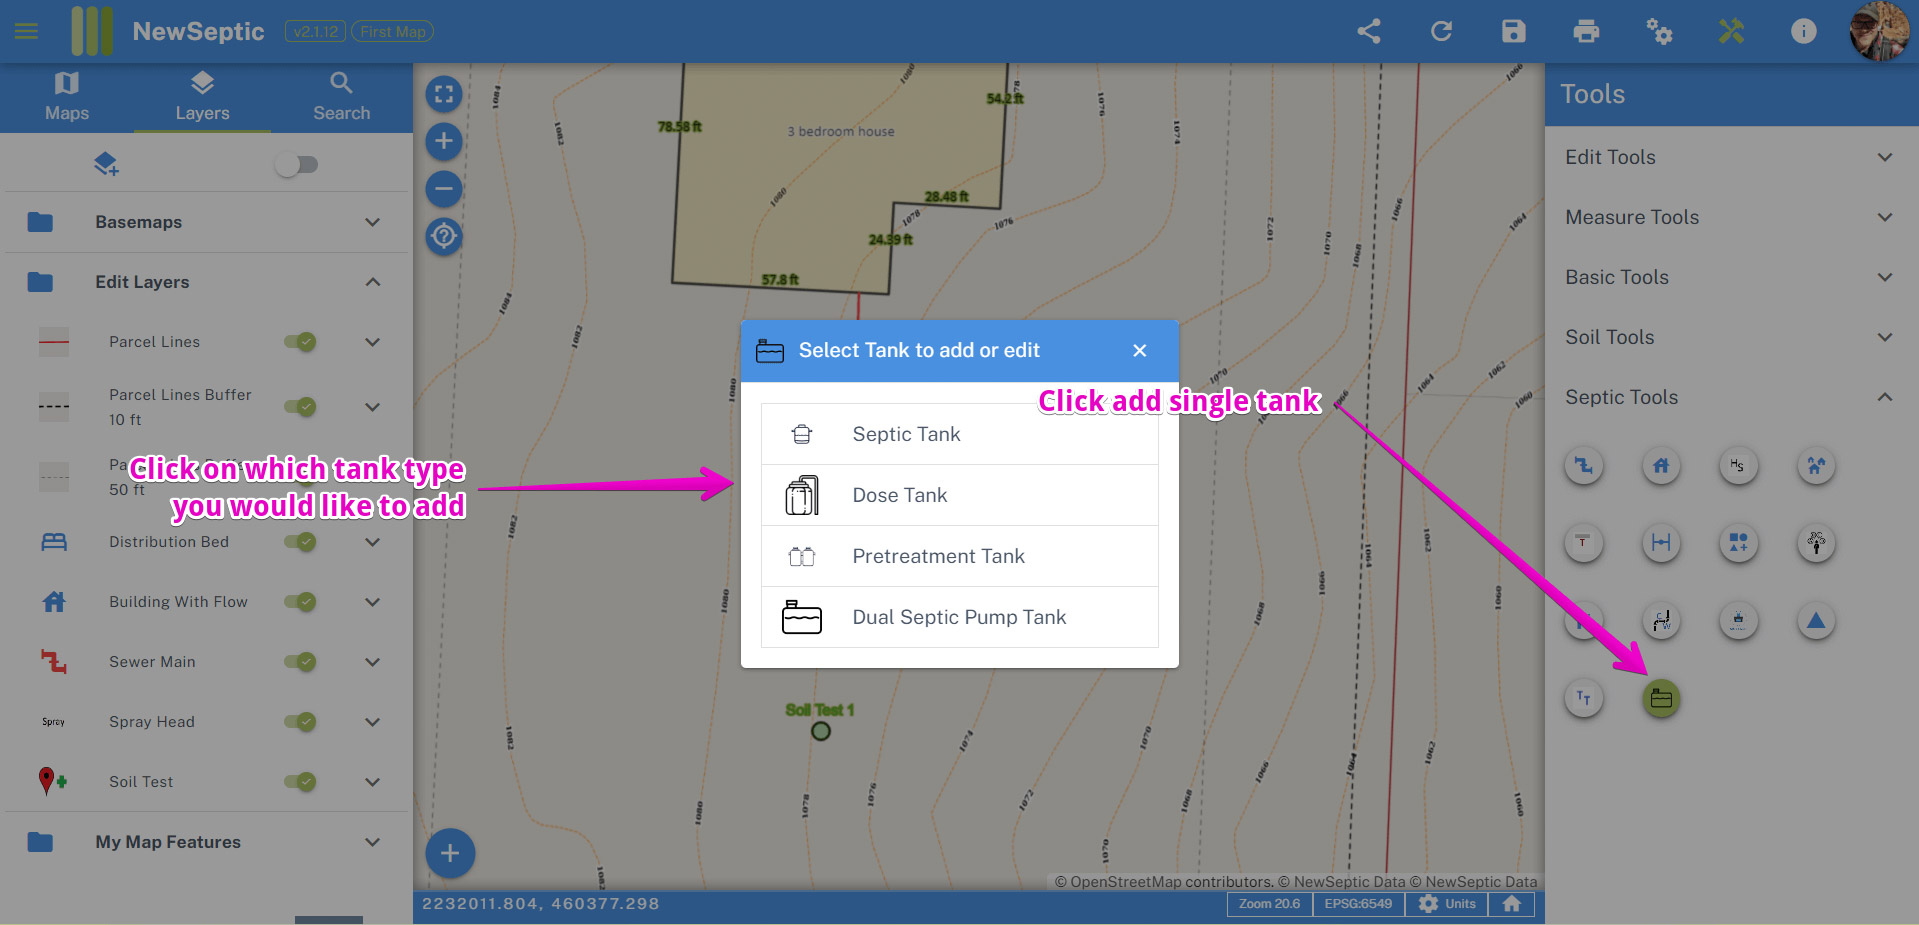
- Locate and click on the single tank tool icon. The single tank tool is on the right tool panel. Click on the tool, then select the tank type you would like to add:
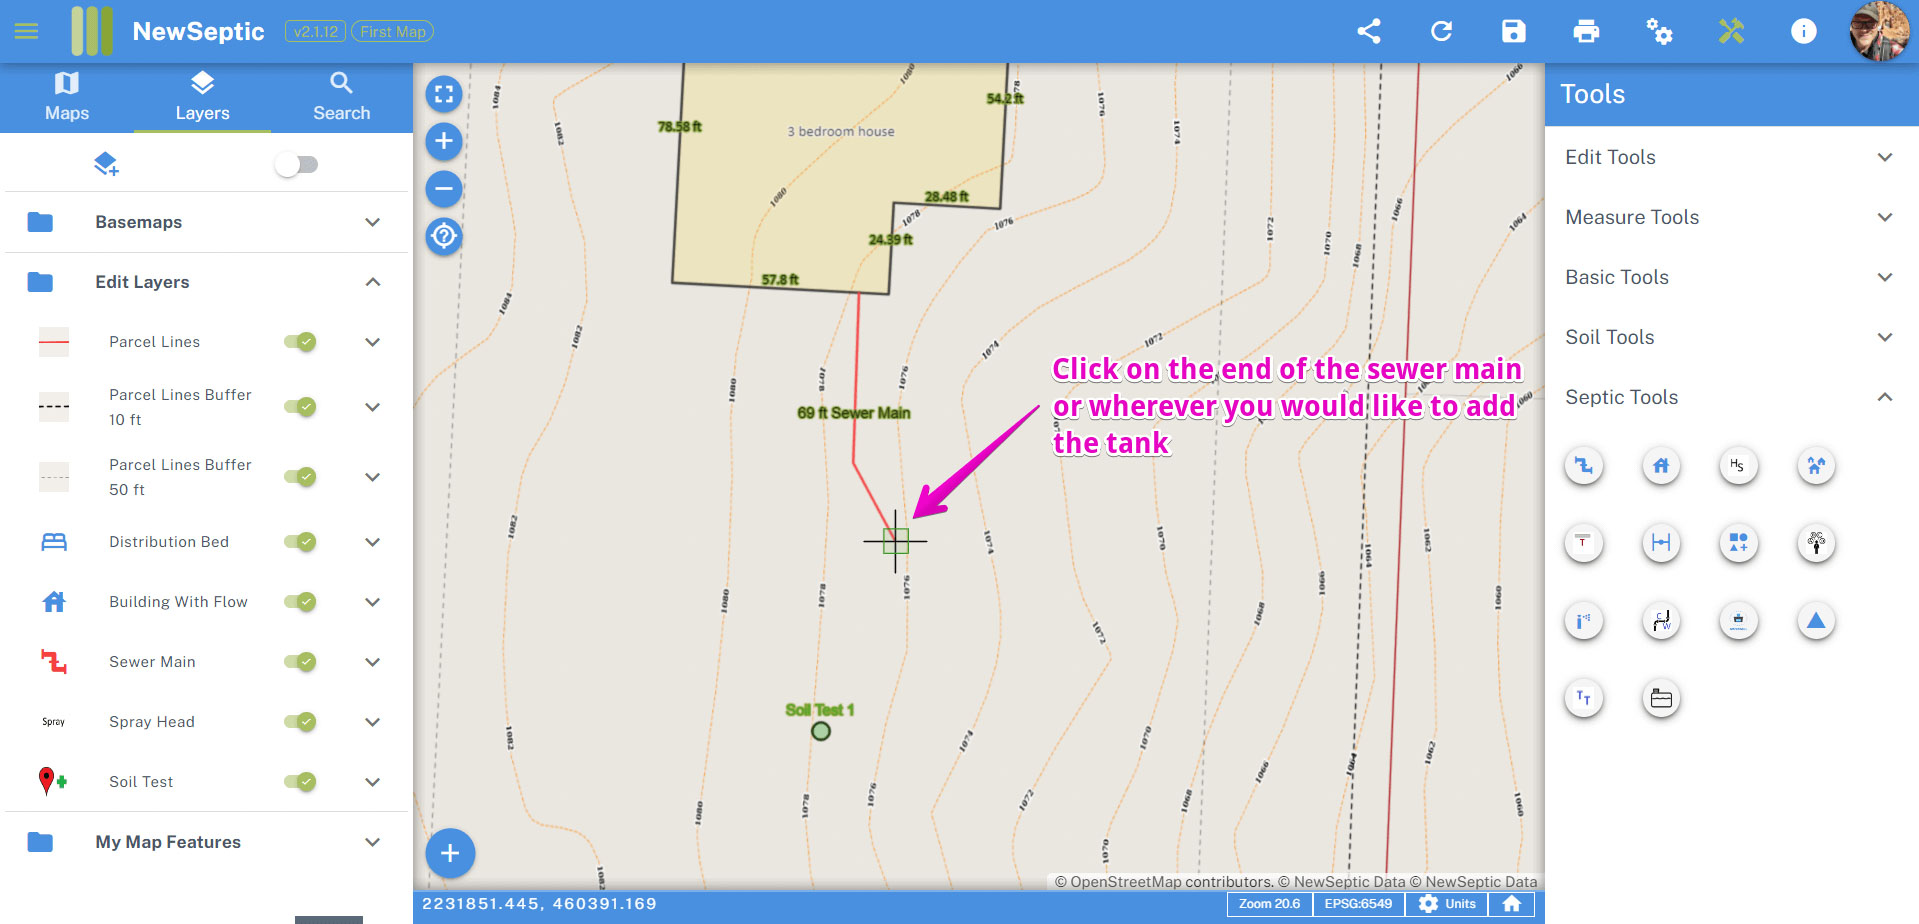
- Move your cursor to the map area and click where you would like the tank drawn
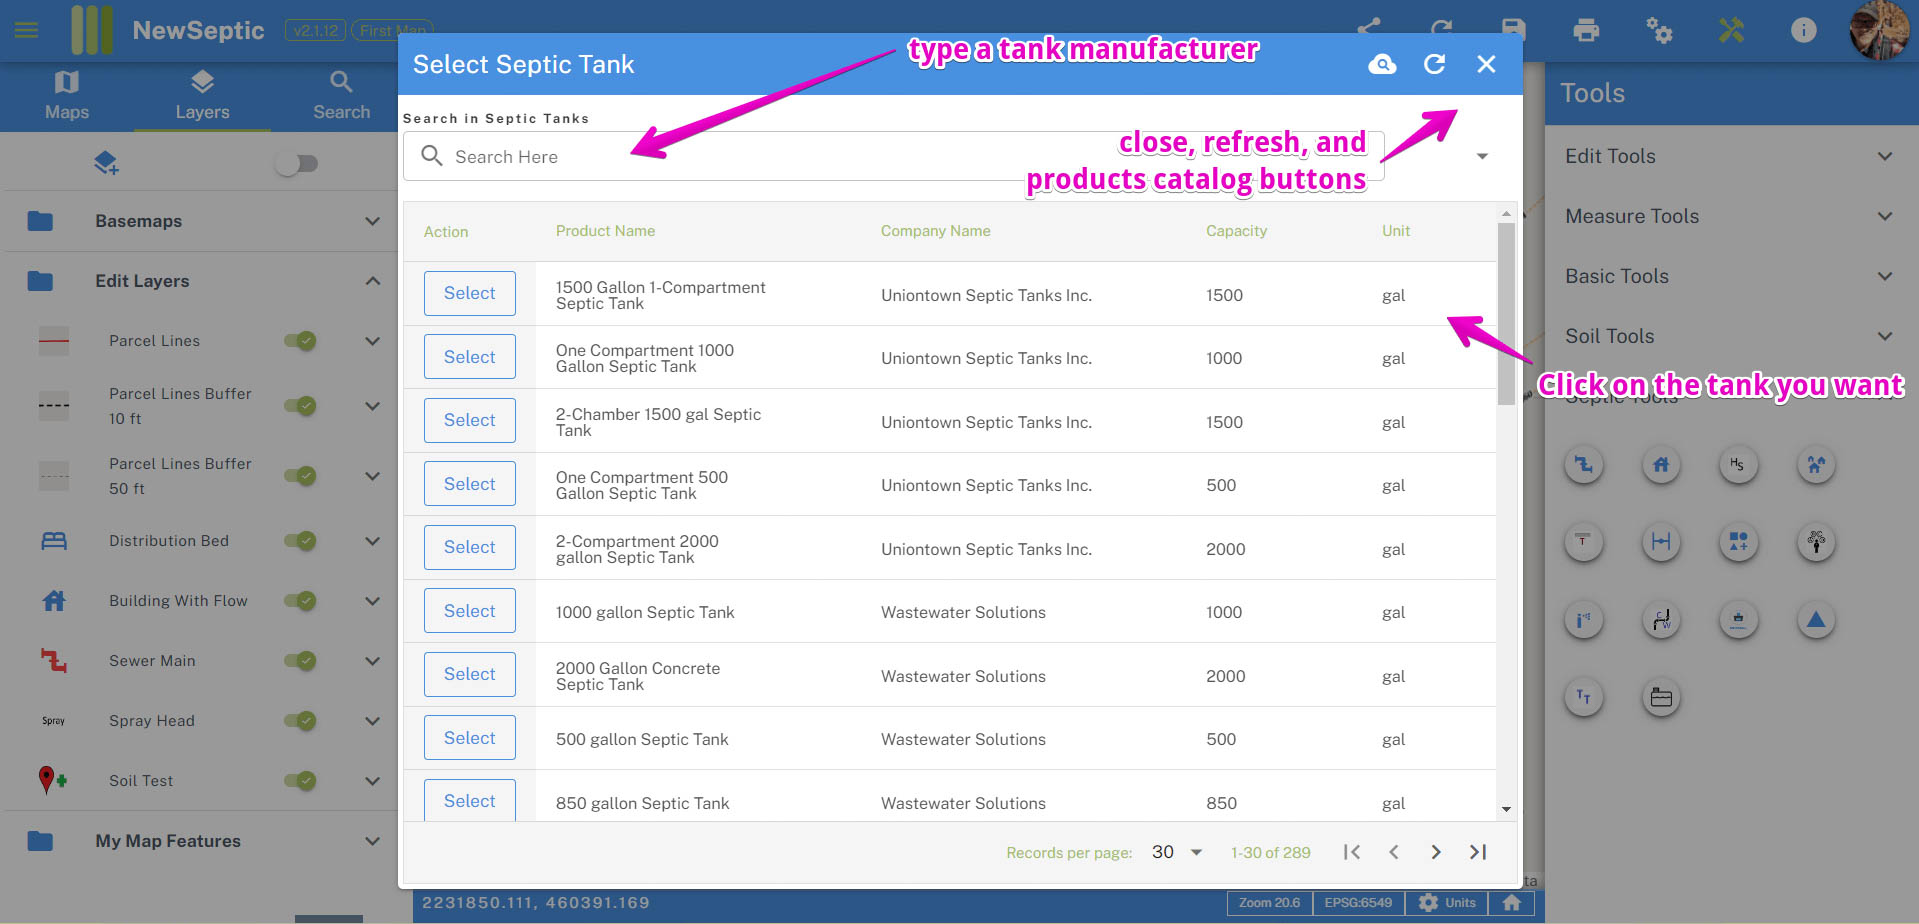
- The tank selection dialog window will show tank manufacturers. The tanks are ordered showing the closest manufacturer first. There is a search box, which you can start typing the name of the manufacturer. If you want to refresh this form, close it, or search a more in-depth products catalog, there are icon buttons on the top right of the window.
- Once the component is added, you should see the component properties. The component properties should include only those you would need to see in your area of operation. Component properties are specific to States and/or Counties and Members. Click here to learn more about component properties and setting defaults.
Treatment Train Tool
The treatment train tool was built to streamline a process you typically encounter when designing tank systems.
To start using the tool:
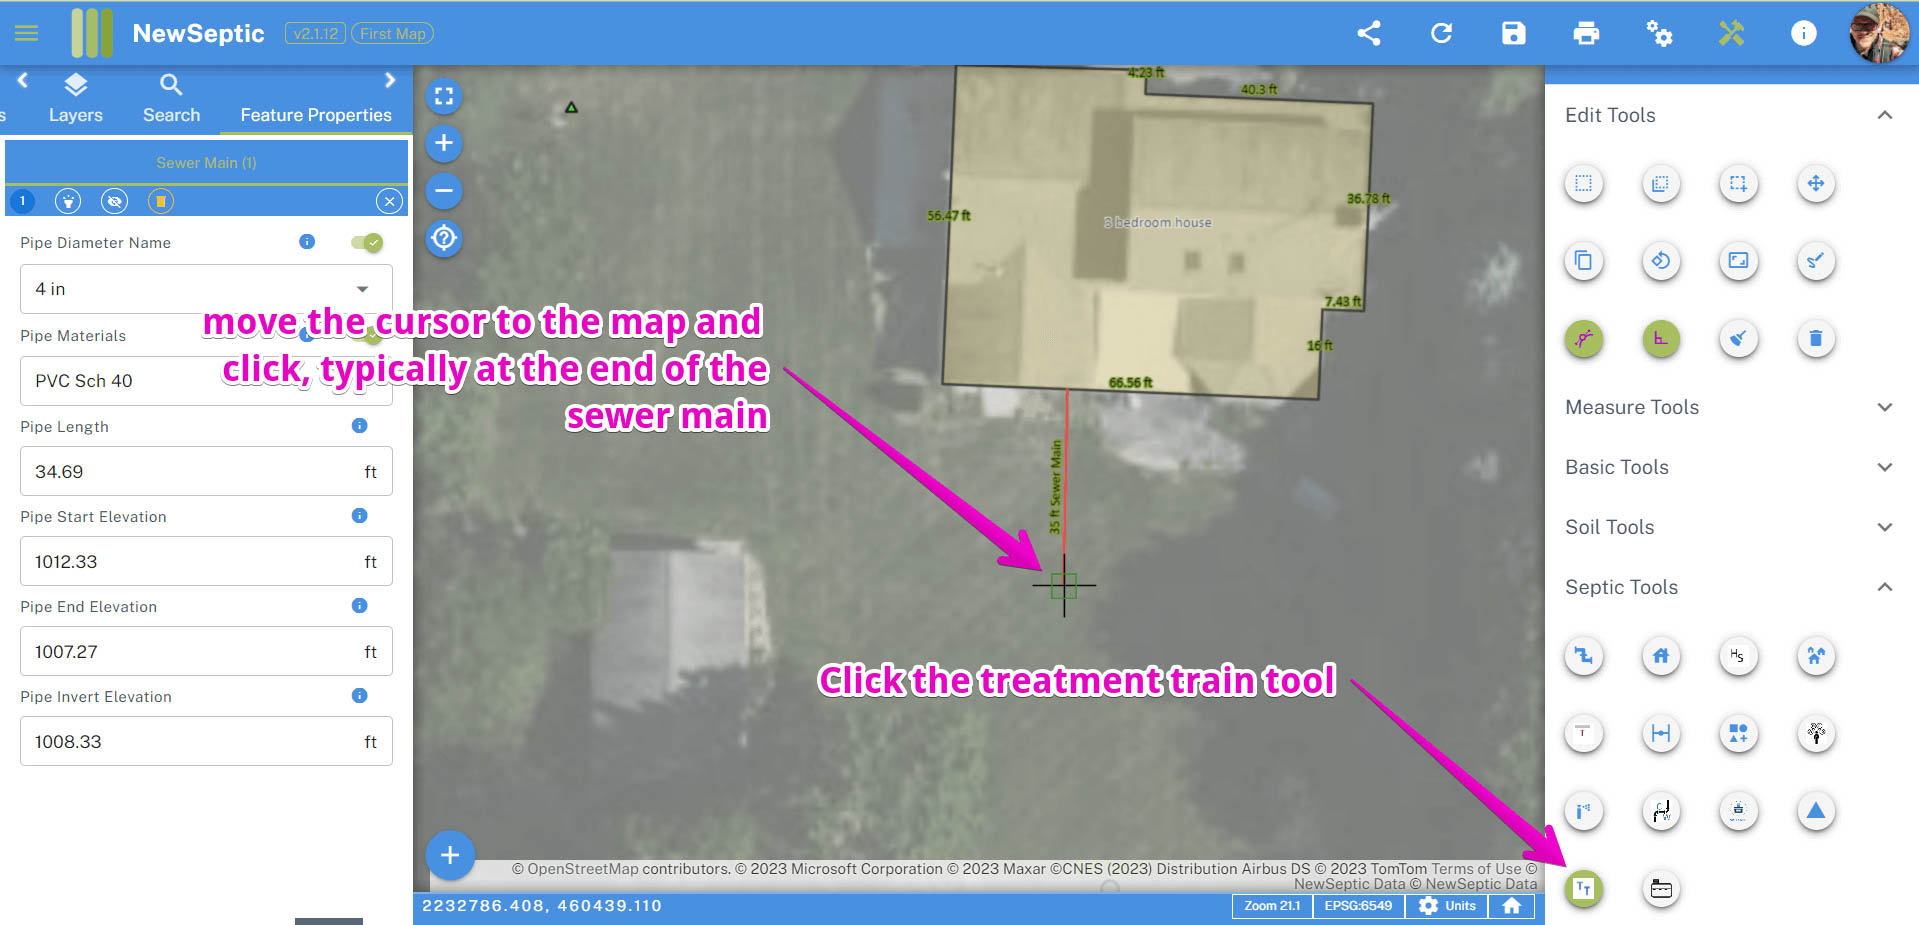
Locate and click on the treatment train tool icon. The treatment train tool is on the right tool panel. Click on the tool, then click on the location of the map you would like the tanks to be drawn:
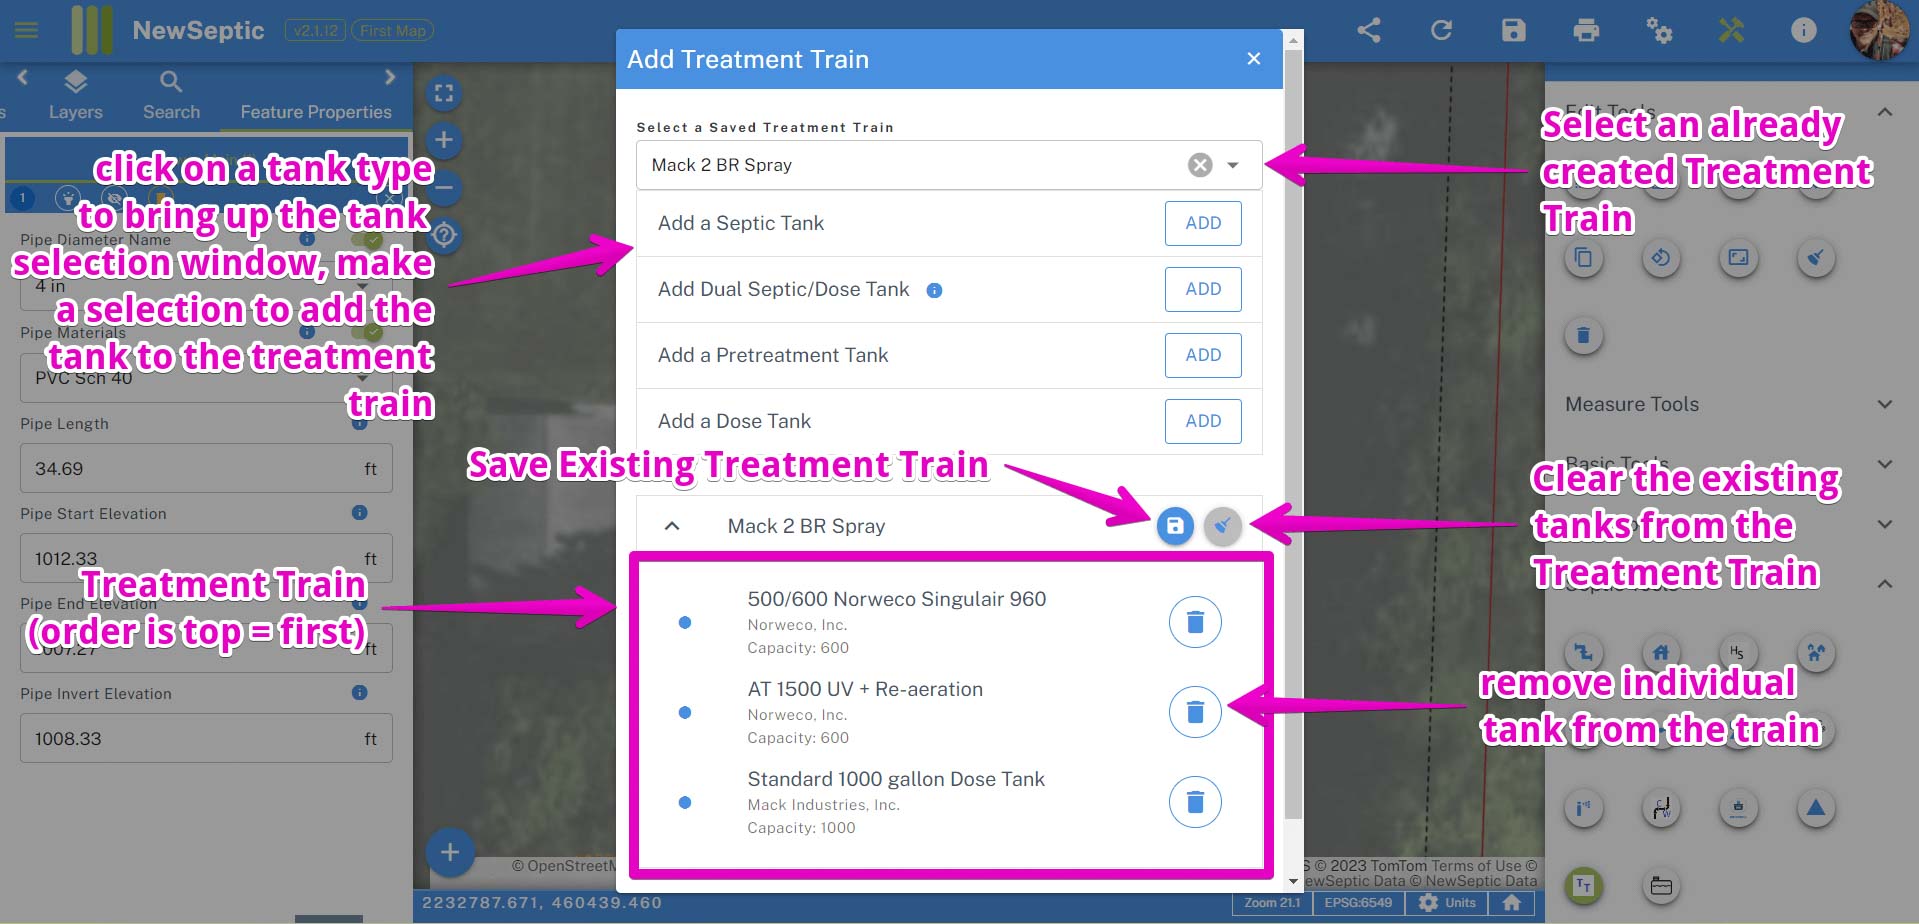
Select an existing Treatment Train from your custom list or create your own treatment train and save it to your list:
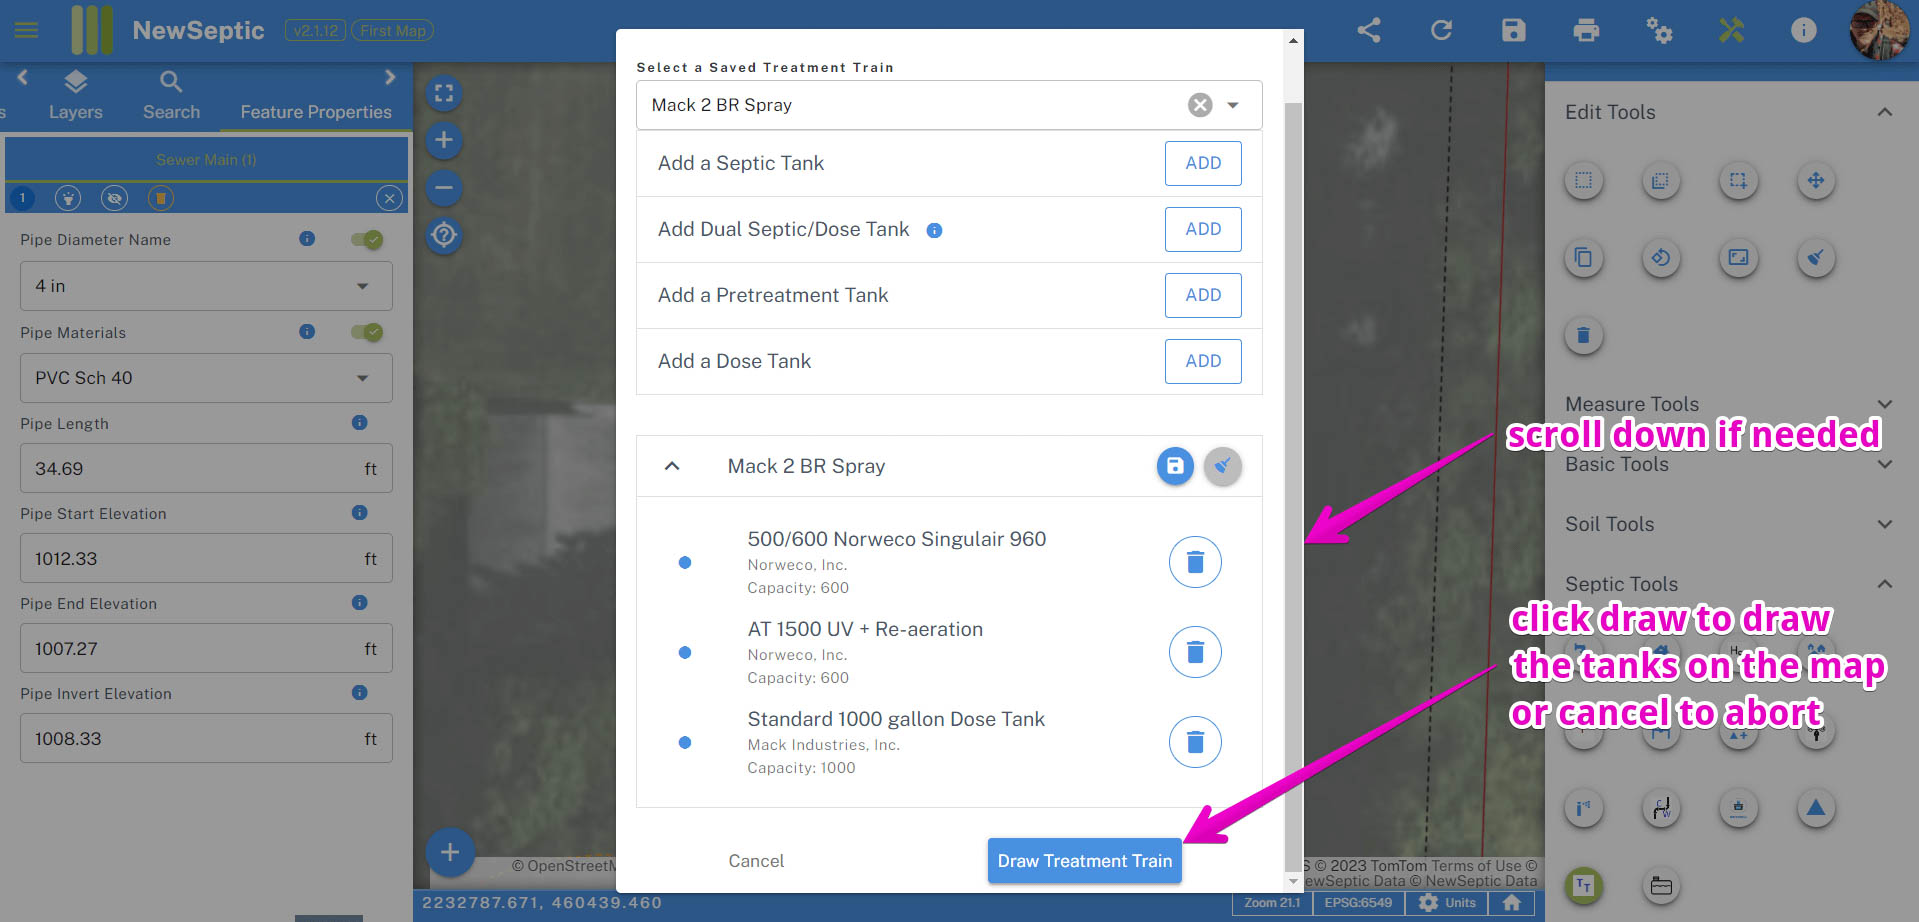
- Click Draw Treatment Train or Cancel to abort. You may have to scroll down to view the Draw button.
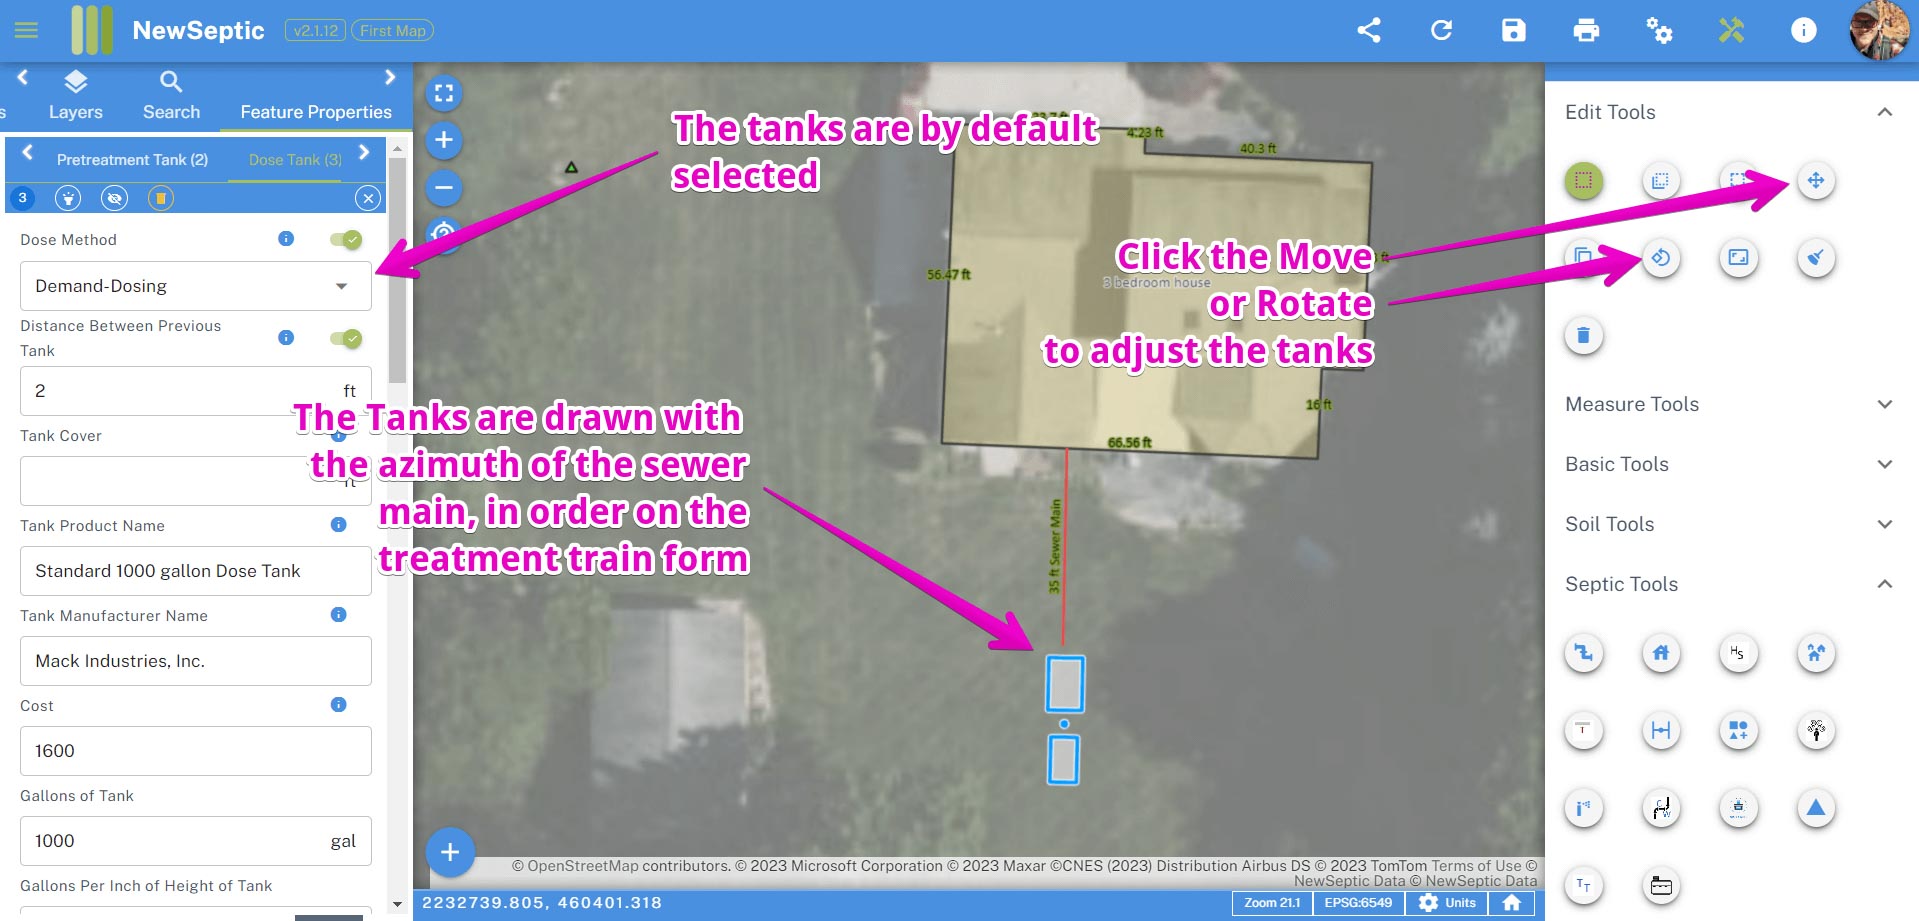
The tanks are always drawn with the azimuth of the end of the closest sewer main to the clicked point. The order of the tanks follow the order in the treatment train form:
